Bathroom Remodel Planning Guide for Beginners Budget Style Materials and More
for renovation with sample tiles and a notebook on a wooden stool](image-url "Start with a clear plan before choosing finishes.", image-prompt "Wide-angle view of a small UK bathroom ready for renovation, with sample ceramic tiles, a brass tap, colour swatches, and a notebook on a wooden stool, natural daylight, realistic home interior photography, calm neutral tones")
Start with a budget and timeline that reflect the real work
The budget is not the most exciting part of a bathroom remodel, but it shapes nearly every decision that follows. It affects the layout, the materials, the fixtures, and how much help to bring in.
Start by writing down the work you expect to do. A cosmetic refresh is very different from a full refit.
A light update might include:
Painting walls or ceilings with bathroom-safe paint
Replacing taps, mirrors, lighting, or accessories
Refreshing sealant around the bath or shower
Installing a new vanity unit
Swapping a toilet seat or towel rail
A larger remodel might include:
Removing old tiles and flooring
Replacing the bath, shower, basin, or toilet
Moving pipework
Adding or changing lighting
Improving ventilation
Replastering walls
Fitting underfloor heating
Replacing damaged subfloors
Once the scope is clear, divide the budget into major categories. This makes it easier to see where the money will go and where to save.
Budget area | What to include |
Labour | Builders, plumbers, electricians, tilers, decorators, waste removal |
Fixtures | Bath, shower, toilet, basin, taps, screens, vanity unit |
Materials | Tiles, flooring, grout, adhesive, plasterboard, paint, sealant |
Practical upgrades | Extractor fan, lighting, heating, storage, waterproofing |
Extras | Delivery fees, skip hire, parking, temporary repairs, small tools |
Keep a contingency fund if possible. Bathrooms often hide surprises, especially in older properties. A slow leak, damaged floorboards, uneven walls, or outdated wiring can add cost once the work begins. Allowing a buffer helps stop one issue from derailing the whole project.
Your timeline needs the same honest treatment. A small refresh may fit around weekends. A full bathroom refit often affects daily life, especially if the home has only one bathroom. Think about deliveries, drying times, trade availability, and the order of work.
A typical full remodel may involve:
Finalising the design and budget
Ordering fixtures and materials
Removing the old bathroom
Completing plumbing and electrical work
Preparing walls and floors
Waterproofing wet areas
Tiling and flooring
Installing fixtures
Decorating and sealing
10. Final checks and snagging
If supplies are delayed, the whole schedule can slip. Try not to remove a working bathroom until key items have arrived or have confirmed delivery dates.
Choose a design style that suits the home and daily life
Style matters because the bathroom should feel good to use. Function matters because it has to cope with steam, water, storage needs, cleaning, and morning routines. The best remodels balance both.
Before choosing finishes, ask how the room needs to work.
Does it need to handle busy school mornings? Is it a calm ensuite for two adults? Will it suit guests? Does anyone need easier access, a walk-in shower, or extra lighting? Is storage more valuable than a freestanding bath?
These questions help avoid design choices that look lovely but irritate you later.
Pick a style direction before shopping
Bathroom showrooms and online shops can quickly become overwhelming. One minute the plan is soft neutral stone. Ten minutes later, black brassware, green tiles, and a patterned floor all seem tempting.
Choose a broad style direction first. For example:
Modern and minimal Simple shapes, wall-hung furniture, large-format tiles, concealed storage, and clean lines.
Classic and traditional Panelled bath fronts, chrome taps, shaker-style vanity units, patterned floor tiles, and soft wall colours.
Warm and natural Stone-effect surfaces, wood-look cabinetry, brushed brass, soft lighting, and earthy tones.
Bold and characterful Statement tiles, darker colours, strong contrast, unusual mirrors, or vintage-inspired details.
In many homes around Orpington and the wider UK, bathrooms are compact. A clear design direction helps a small room feel intentional rather than crowded.
Build a colour scheme that will last
A bathroom colour scheme should work in different light. Small rooms, north-facing windows, and frosted glass can all change how colours appear.
A simple colour plan might include:
One main wall or tile colour
One secondary colour for furniture or feature tiles
One metal finish for taps, handles, and shower fittings
One or two accent tones through towels, plants, prints, or accessories
Neutral schemes are popular for a reason. White, warm grey, stone, beige, soft green, and muted blue can make a bathroom feel clean and calm. That does not mean the room needs to be plain. Texture, tile shape, grout colour, lighting, and natural materials can add depth without making the space busy.
If you love a strong colour, use it where it can be changed later. Painted walls, accessories, and artwork are easier to update than a full wall of expensive statement tiles.

Select materials and fixtures with care
Materials and fixtures decide how the bathroom looks, how long it lasts, and how easy it is to clean. The cheapest item is not always the best value, and the most expensive one is not always the right fit.
Start with the areas that take the most wear.
Flooring needs grip, water resistance, and stability
Bathroom flooring must cope with water, heat, and regular cleaning. Common choices include porcelain tiles, ceramic tiles, luxury vinyl tile, and sheet vinyl.
Porcelain tiles are hard-wearing and water-resistant, but they need a well-prepared floor and skilled fitting. Vinyl can be warmer underfoot and more forgiving in family bathrooms. Natural stone looks beautiful, but it needs sealing and more maintenance.
Whatever you choose, check the slip rating and whether it is suitable for bathrooms. Glossy floor tiles can look smart but may be less practical when wet.
Wall finishes should match the wet zone
Not every wall in a bathroom needs full tiling. Tiling wet areas, such as shower enclosures and bath surrounds, keeps water away from the wall structure. Outside wet zones, good bathroom paint can work well and reduce cost.
For shower areas, discuss waterproofing with the fitter. Tile and grout alone are not the waterproof layer. A proper backer board or tanking system helps protect the room behind the tiles.
Fixtures should fit the room, not just the wishlist
Measure carefully before buying a bath, shower tray, basin, vanity unit, toilet, or radiator. Look at door swings, shower screen movement, walking space, and where towels will hang.
A layout that works on paper can feel cramped if clearances are ignored.
Useful checks include:
Can the bathroom door open fully?
Is there enough space in front of the toilet and basin?
Will a shower screen hit a vanity or radiator?
Can storage drawers open without clashing?
Is the towel rail close enough to the bath or shower?
Can cleaning tools reach around the toilet and basin?
Good bathroom storage is often overlooked. A mirrored cabinet, recessed shelf, vanity drawers, or tall slim cupboard can make the room easier to use every day. Open shelves look attractive, but closed storage usually keeps a small bathroom calmer.
Pay attention to the small details
Grout colour, sealant, waste covers, handles, flush plates, and bottle traps all affect the finished look. Pick finishes that work together.
Chrome is widely available and easy to match. Brushed brass, matte black, and nickel can look striking, but matching every part across different brands may be harder. If consistency matters, buy taps, shower fittings, wastes, and accessories from the same range where possible.
When getting stated with your bathroom project, collect samples before committing. View tiles and colours in the actual room, at different times of day, under natural and artificial light.
Decide what to DIY and when to hire a contractor
Doing some work yourself can save money and make the project feel more personal. The key is knowing which jobs are safe and sensible to take on.
Many homeowners can handle small cosmetic tasks with care and patience. Painting, changing accessories, replacing a mirror, fitting shelves, or removing old silicone may be realistic weekend jobs.
More technical work needs skill, tools, and experience. Poor plumbing or electrical work can cause leaks, damage, and safety issues. It can also create problems when selling the property.
Better for DIY | Better for a professional |
Painting walls and ceilings | Moving pipework |
Adding hooks, shelves, and accessories | Electrical work and new lighting circuits |
Replacing a shower curtain or bath panel | Waterproofing a shower area |
Removing old sealant and resealing small areas | Tiling large or uneven areas |
Assembling flat-pack bathroom furniture | Installing a bath, shower tray, or toilet |
For UK homes, electrical work in bathrooms has strict safety requirements because water and electricity are close together. Use a qualified electrician for bathroom electrics, especially for new circuits, extractor fans, illuminated mirrors, electric showers, and underfloor heating.
Plumbing also needs care. Even a small leak behind a vanity unit or under a bath can cause expensive damage before anyone notices. A skilled plumber will understand isolation valves, waste falls, water pressure, and how to make future maintenance easier.
How to choose the right trades
Good tradespeople are often booked in advance, so start early. Ask neighbours, local community groups, or trusted friends for recommendations. In areas such as Orpington, word of mouth can be useful because local trades will already understand common house types and access issues.
Before agreeing to work, ask for:
A written quote with a clear scope
Details of what is included and excluded
Expected start and finish dates
Payment schedule
Proof of relevant qualifications where needed
Public liability insurance
Recent examples of similar work
Be cautious with vague quotes. If one quote is much lower than the rest, check what has been left out. Waste disposal, making good, plastering, tile trim, silicone, and final decorating may not be included unless stated.
Plan plumbing, electrics, ventilation, and final details before work begins
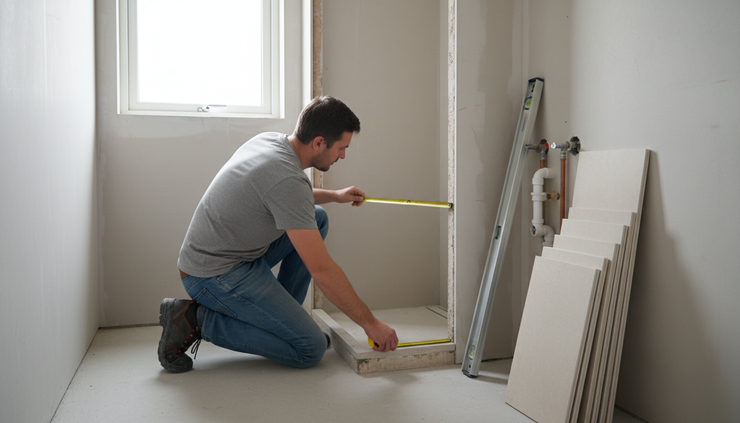
The hidden parts of a bathroom are just as important as the visible finishes. Plumbing, electrics, ventilation, heating, and waterproofing all affect how the room performs for years.
Keep plumbing moves to a minimum where possible
Moving a basin a short distance may be simple. Moving a toilet across the room can be much harder because soil pipes need the right fall and route. The more plumbing moves, the more time, cost, and disruption the project may involve.
If the existing layout works, improving it with better fixtures, smarter storage, and a new shower or bath can be more cost-effective than changing everything.
That said, a layout change can be worth it if it fixes a major problem. Replacing a cramped bath with a walk-in shower, adding a larger basin, or moving a radiator to free wall space can make the room much easier to use.
Get the electrics planned early
Bathroom electrics need decisions before walls are closed and tiles are fitted. Plan where lighting, switches, shaver sockets, extractor fans, mirrors, and heating controls will go.
Think about layers of lighting:
Ceiling lights for general brightness
Mirror lighting for shaving, skincare, and make-up
Low-level or softer lighting for night-time use
Natural light where privacy allows
All fittings must suit bathroom zones. A qualified electrician can advise where items can safely go and what rating they need.
Do not overlook ventilation
Bathrooms create moisture every day. Without good ventilation, steam can lead to peeling paint, mould, damaged grout, and musty smells.
A good extractor fan is especially useful in compact bathrooms, internal bathrooms, or rooms with small windows. Choose a fan suited to the room size and usage. Timer or humidity-sensing models can help remove moisture after the room is used.
Confirm the project order before day one
Before work starts, agree how the job will run. Good sequencing avoids damage and delays.
A clear pre-start checklist might include:
Fixtures and tiles have arrived and been checked for damage
The bathroom layout is agreed
Tile direction and grout colour are confirmed
Tap and shower positions are marked
Lighting and fan positions are agreed
Access to stopcocks and fuse boards is clear
Parking and delivery access are sorted
A plan exists for washing and toilet use during the work
Keep one folder, digital or physical, with receipts, product details, guarantees, paint names, tile batch numbers, and fitting instructions. This is useful during the project and helpful later if repairs or replacements are needed.
Finish with a bathroom that works beautifully every day
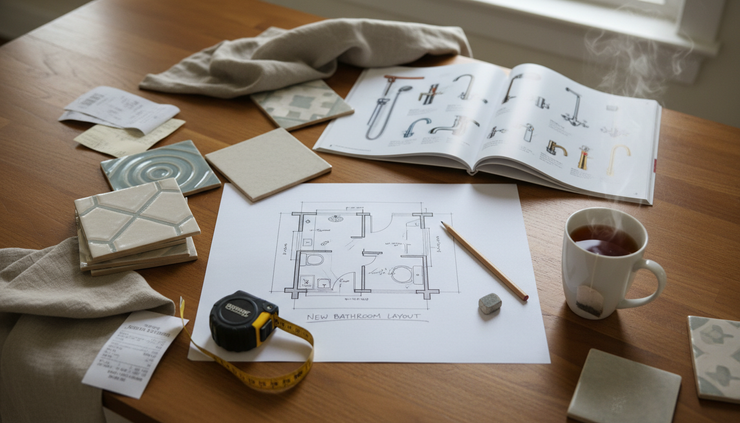
A beginner-friendly bathroom remodel is not about knowing every trade term before starting. It is about making steady decisions in the right order.
Set a budget before falling in love with finishes. Build a realistic timeline before removing the old suite. Choose a style that fits the home, then narrow down colours, materials, and fixtures. Be honest about which jobs are suitable for DIY and which need a qualified professional. Plan plumbing, electrics, and ventilation early, because these hidden elements keep the room safe, comfortable, and durable.
The best bathrooms feel good on day one and still work well years later. Aim for a space that is practical in the morning, relaxing in the evening, easy to clean, and pleasant to look at. When function and aesthetics support each other, the remodel becomes much easier to live with, not just easier to admire.


Comments